Would you like to react to this message? Create an account in a few clicks or log in to continue.


HomeHome  Latest imagesLatest images  RegisterRegister  Log inLog in  


 Tutorial for 10/5/21 READY

Go down 
2 posters
AuthorMessage
cherylndesigns

cherylndesigns


Posts : 706
Join date : 2021-08-07
Location : Oklahoma

Tutorial for 10/5/21 READY Empty
PostSubject: Tutorial for 10/5/21 READY   Tutorial for 10/5/21 READY I_icon_minitimeTue Sep 21, 2021 8:40 am

Due 30.09. for 05.10. Tutorial by Cheryl

Hello Scrappers.  Cheryl aka Cherylndesigns here. Before we get started, I'm using Photoshop Elements 2018 for my tutorial.

Do you LOVE using frames?  Do you also love using clipping masks along with the frames you want to use?  I used to be so frustrated by frames - all I knew how to do with them was to put them "around my photograph" then make them fit in the frame by resizing my photo. What if I told you that you can make your own clipping masks out of frames?  One day, I was playing around and discovered that I could make my frames into clipping masks!  Voila! It changed my life.  First of all, for today's tutorial, I'll be using Pink Reptile Design's Coffee O'clock Kit.

Tutorial for 10/5/21 READY Coffee12

Tutorial for 10/5/21 READY Coffee13

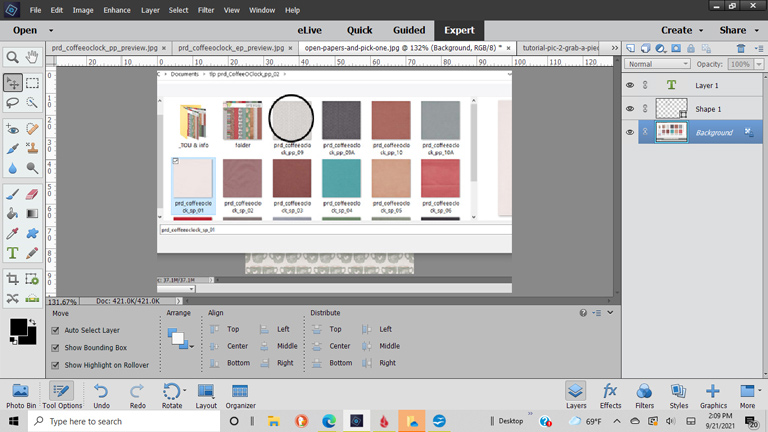
So, there are different colored frames in this kit, so depending on what your picture looks like, you can choose the best color.  For my tutorial, I'm using a dark frame.

Tutorial for 10/5/21 READY Pull-a11

I know it's angled, but don't worry about that right now.  You can straighten it out if you want to.  

Let's get started.  You'll also need a piece of paper - I pulled one from the Coffee O'Clock papers:  I chose this piece because it's helpful to get a piece of paper that has a good contrast to your frame.  It's so much easier to work with.

Tutorial for 10/5/21 READY Pull-o10

Tutorial for 10/5/21 READY Paper-10

Open the frame, straighten if desired, then "pull" the plain paper up onto the frame.  It will have to be resized.

Tutorial for 10/5/21 READY Pull-t10

Make sure that the INSIDE of the frame is filled with your patterned paper and none of the transparent image is showing around the edges.  

Here are a few screenshots to demonstrate what the final step is:  Click on LAYER 0 which is your frame.

Tutorial for 10/5/21 READY 2021-014

Click on "soft edge"

Tutorial for 10/5/21 READY 2021-011

Then play with the sliders and bevel slightly - this will make your frame stand out on your page.

Tutorial for 10/5/21 READY 2021-012

Then "pull your picture" inside of the frame.

Tutorial for 10/5/21 READY 2021-013

Click on "LAYER"

Tutorial for 10/5/21 READY Click-10

Click on "CREATE CLIPPING MASK"

Tutorial for 10/5/21 READY Create10

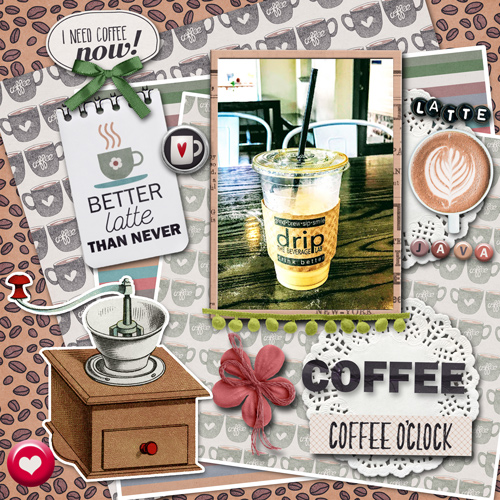
Now you can resize your image.  I want my coffee cup to be large and the main theme, so I used the handles on the corners of the photographed and pulled the edges out to make the cup front and center.

Tutorial for 10/5/21 READY My-enl10

Now, through the magic of "Blogdom", here is my finished layout, complete with the picture I just clipped into the frame.

Tutorial for 10/5/21 READY Prd-tu10

I hope I've shown you something you didn't already know.  A side note, I also use this method to clip pictures and papers into things besides traditional frames.  Just think of the possibilities!  Next time you have an "opening", be it a box, or whatever, repeat these same steps and you can clip pictures right into those openings.

mirjam likes this post

Back to top Go down
mirjam
Admin
mirjam


Posts : 13920
Join date : 2010-02-12
Location : netherlands

Tutorial for 10/5/21 READY Empty
PostSubject: Re: Tutorial for 10/5/21 READY   Tutorial for 10/5/21 READY I_icon_minitimeTue Oct 05, 2021 10:24 pm

GREAT tutorial Cheryl!!!!! :chapeau: :burnheart: :highfive: :thumbsup:

cherylndesigns likes this post

Back to top Go down
https://pinkreptiledesigns.forumotion.com
cherylndesigns

cherylndesigns


Posts : 706
Join date : 2021-08-07
Location : Oklahoma

Tutorial for 10/5/21 READY Empty
PostSubject: Re: Tutorial for 10/5/21 READY   Tutorial for 10/5/21 READY I_icon_minitimeWed Oct 06, 2021 1:05 am

Thanks so much, Mirjam!! :wub: :wub: :wub:

It looks REALLY good!!!

mirjam likes this post

Back to top Go down
mirjam
Admin
mirjam


Posts : 13920
Join date : 2010-02-12
Location : netherlands

Tutorial for 10/5/21 READY Empty
PostSubject: Re: Tutorial for 10/5/21 READY   Tutorial for 10/5/21 READY I_icon_minitimeWed Oct 06, 2021 9:13 am

I agree it looks really good!!! :highfive: :jippie:

cherylndesigns likes this post

Back to top Go down
https://pinkreptiledesigns.forumotion.com
cherylndesigns

cherylndesigns


Posts : 706
Join date : 2021-08-07
Location : Oklahoma

Tutorial for 10/5/21 READY Empty
PostSubject: Re: Tutorial for 10/5/21 READY   Tutorial for 10/5/21 READY I_icon_minitimeWed Oct 06, 2021 8:39 pm

Awwwwwww, thanks so much! :biglove: :wub: Now I have to come up with my next one. I'm thinking......... :putersmile:
Back to top Go down
mirjam
Admin
mirjam


Posts : 13920
Join date : 2010-02-12
Location : netherlands

Tutorial for 10/5/21 READY Empty
PostSubject: Re: Tutorial for 10/5/21 READY   Tutorial for 10/5/21 READY I_icon_minitimeWed Oct 06, 2021 9:43 pm

Looking forward to see what your next post will be about!
Back to top Go down
https://pinkreptiledesigns.forumotion.com
Sponsored content


Tutorial for 10/5/21 READY Empty
PostSubject: Re: Tutorial for 10/5/21 READY   Tutorial for 10/5/21 READY I_icon_minitime

Back to top Go down
 
Tutorial for 10/5/21 READY
Back to top 
Page 1 of 1
 Similar topics
-
» Tutorial due 02.09 for 07.09-READY
» Nov 8th | Tutorial | Ready
» TUTORIAL for 12-6 DUE 12-1 ***READY***
» May Tutorial Due 4-27-23 for 5-2-23 ****READY****
» September 2022 Blog Post Calendar

Permissions in this forum:You cannot reply to topics in this forum
 :: Old Insta/FB Posts-
Jump to: