Do you love the look of decorative borders like scallops but don’t know how to make them yourself? They can be created quickly
and easily with the brush tool. So let me show you how!
First, for our practice we’ll create a new document and a new layer and select the Brush tool or press the B key.
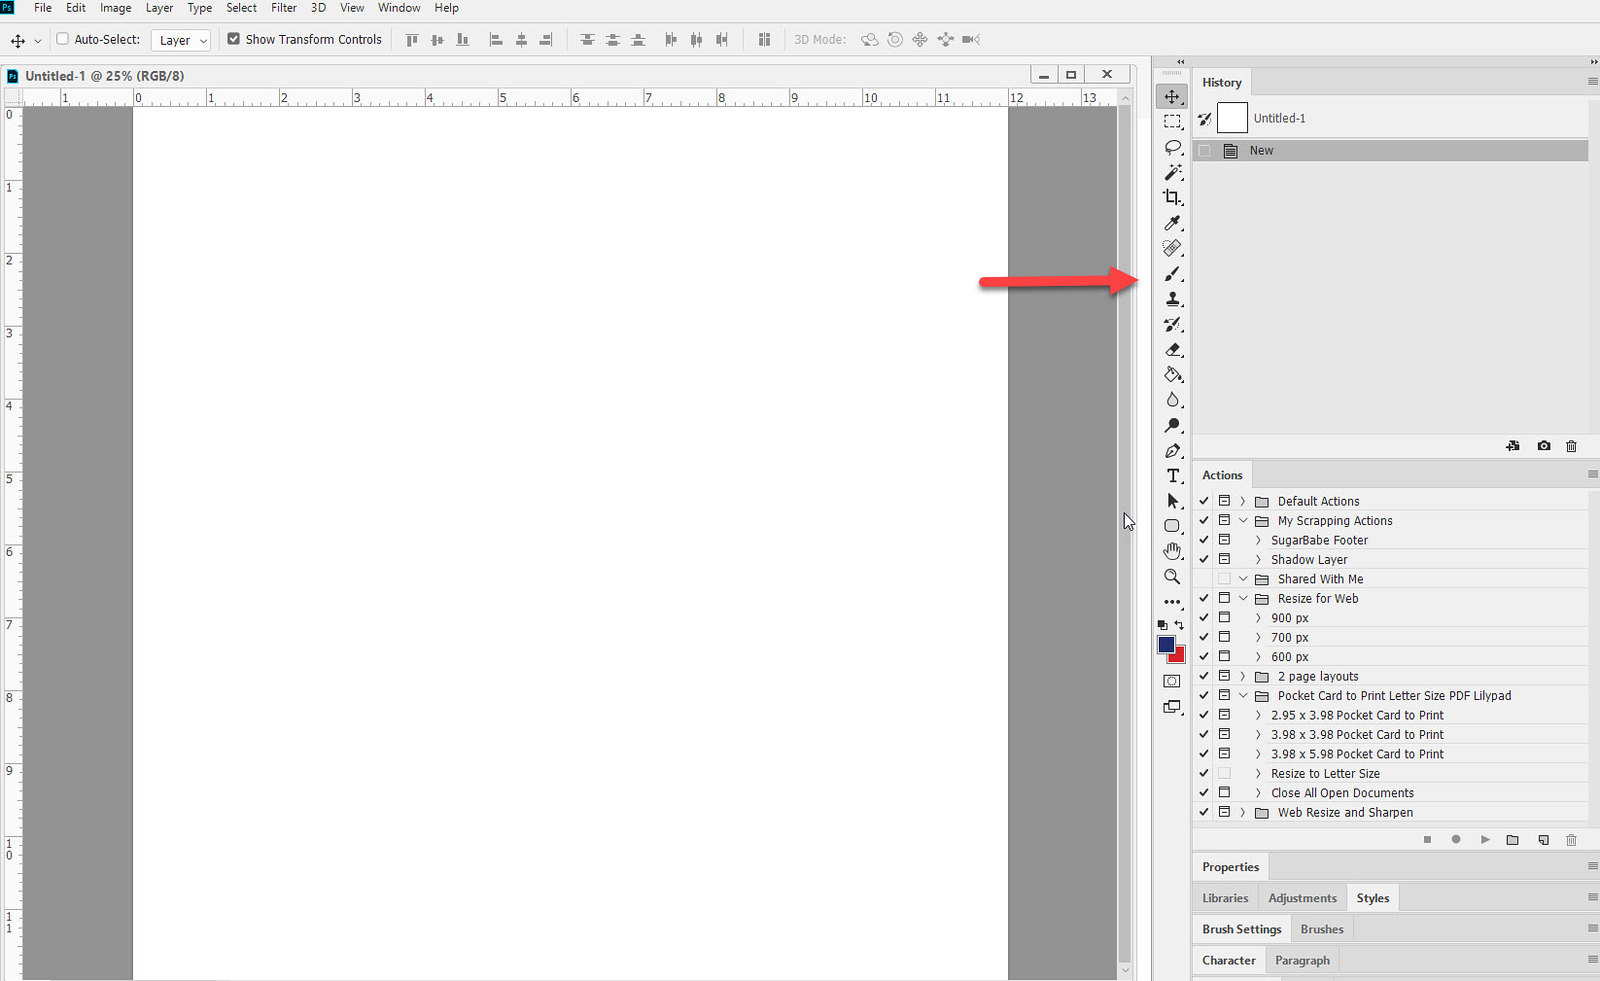 Brush Toola
 by
Stacia, on Flickr
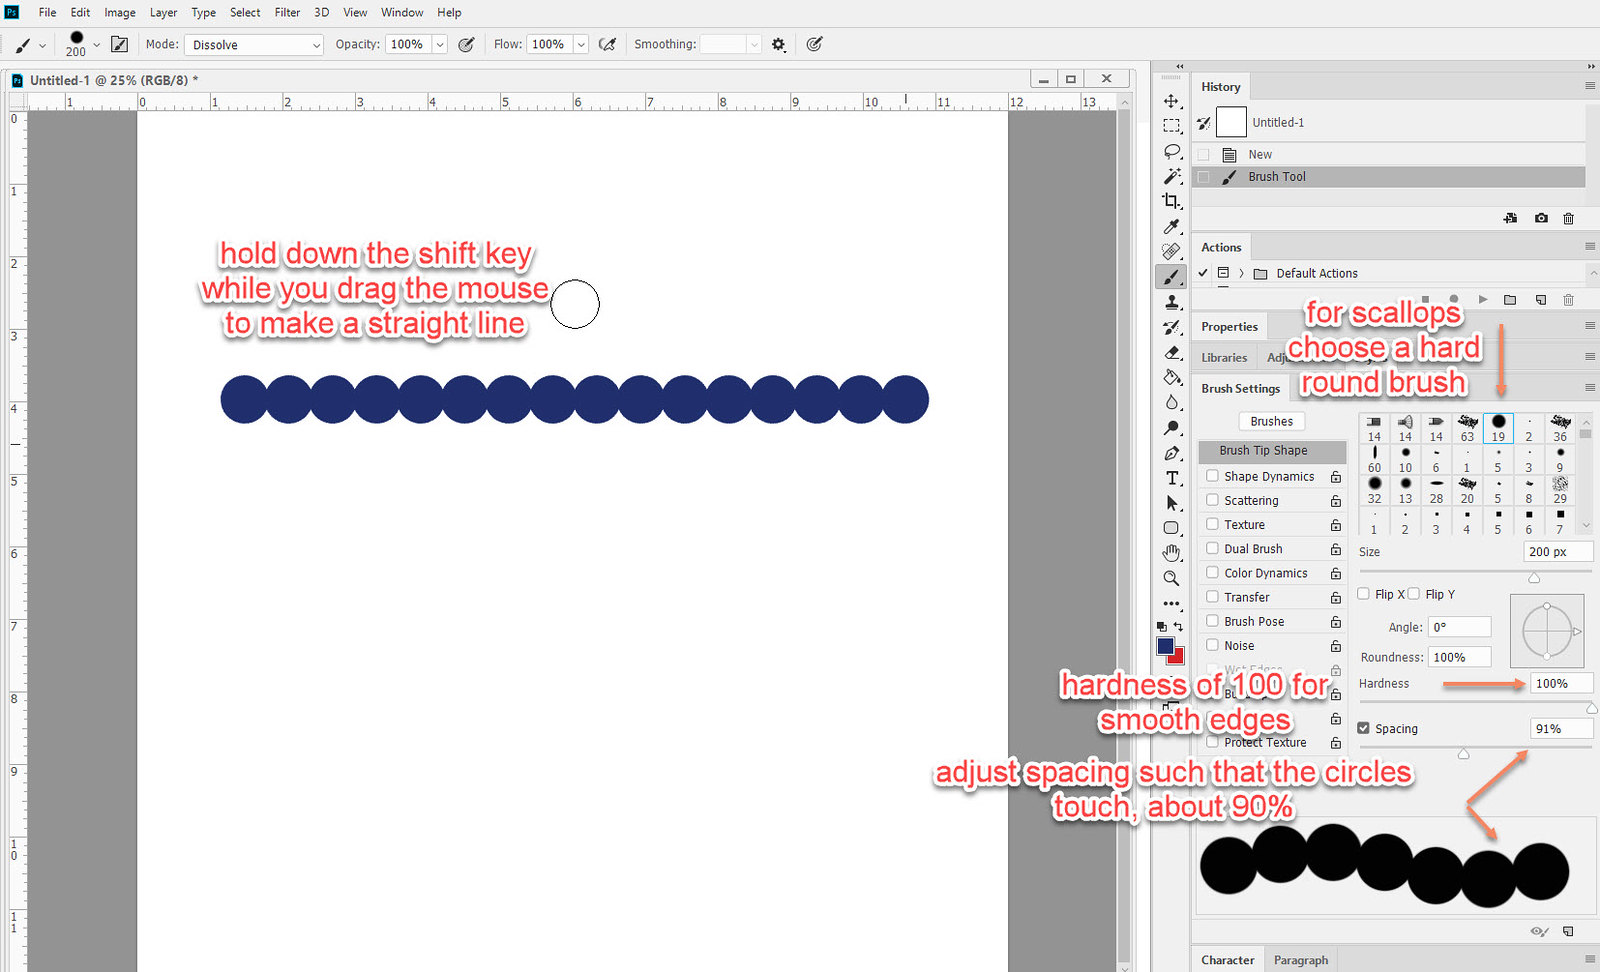
To create a line of scallops, we’ll select a hard round brush and adjust the size up and down with the bracket [ and ] keys. We’ll keep the hardness setting at 100% so the edges are smooth and we’ll adjust the spacing until the sides of the circles overlap slightly – to about 90%.
Most of us cannot freehand a straight line so hold down the shift key while you move the mouse and you’ll get a perfectly straight line.
 Scallop
 by
Stacia, on Flickr
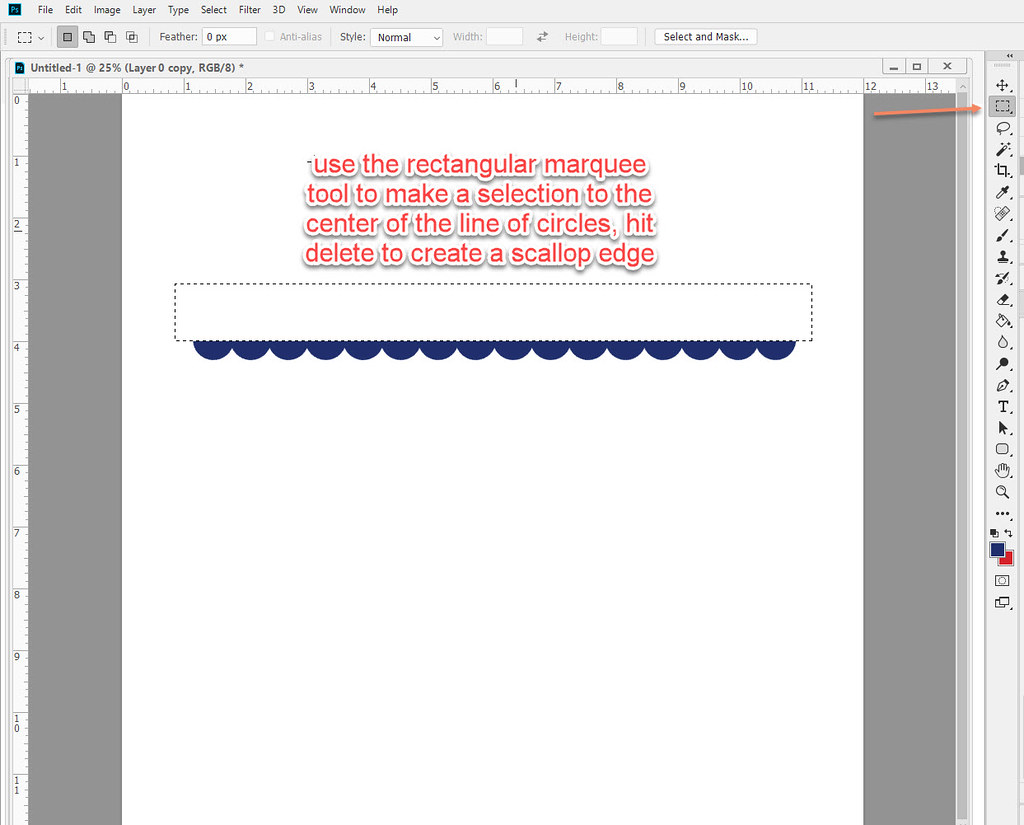
You could use this border as is, or place it underneath the sides of photos or paper to use as a scalloped edge. You could also “cut” it in half to get a true scallop. Use the Rectangular Marquee tool to draw a rectangle over the line of circles about midway. Then hit the delete key to remove half.
 Half scallop
 by
Stacia, on Flickr
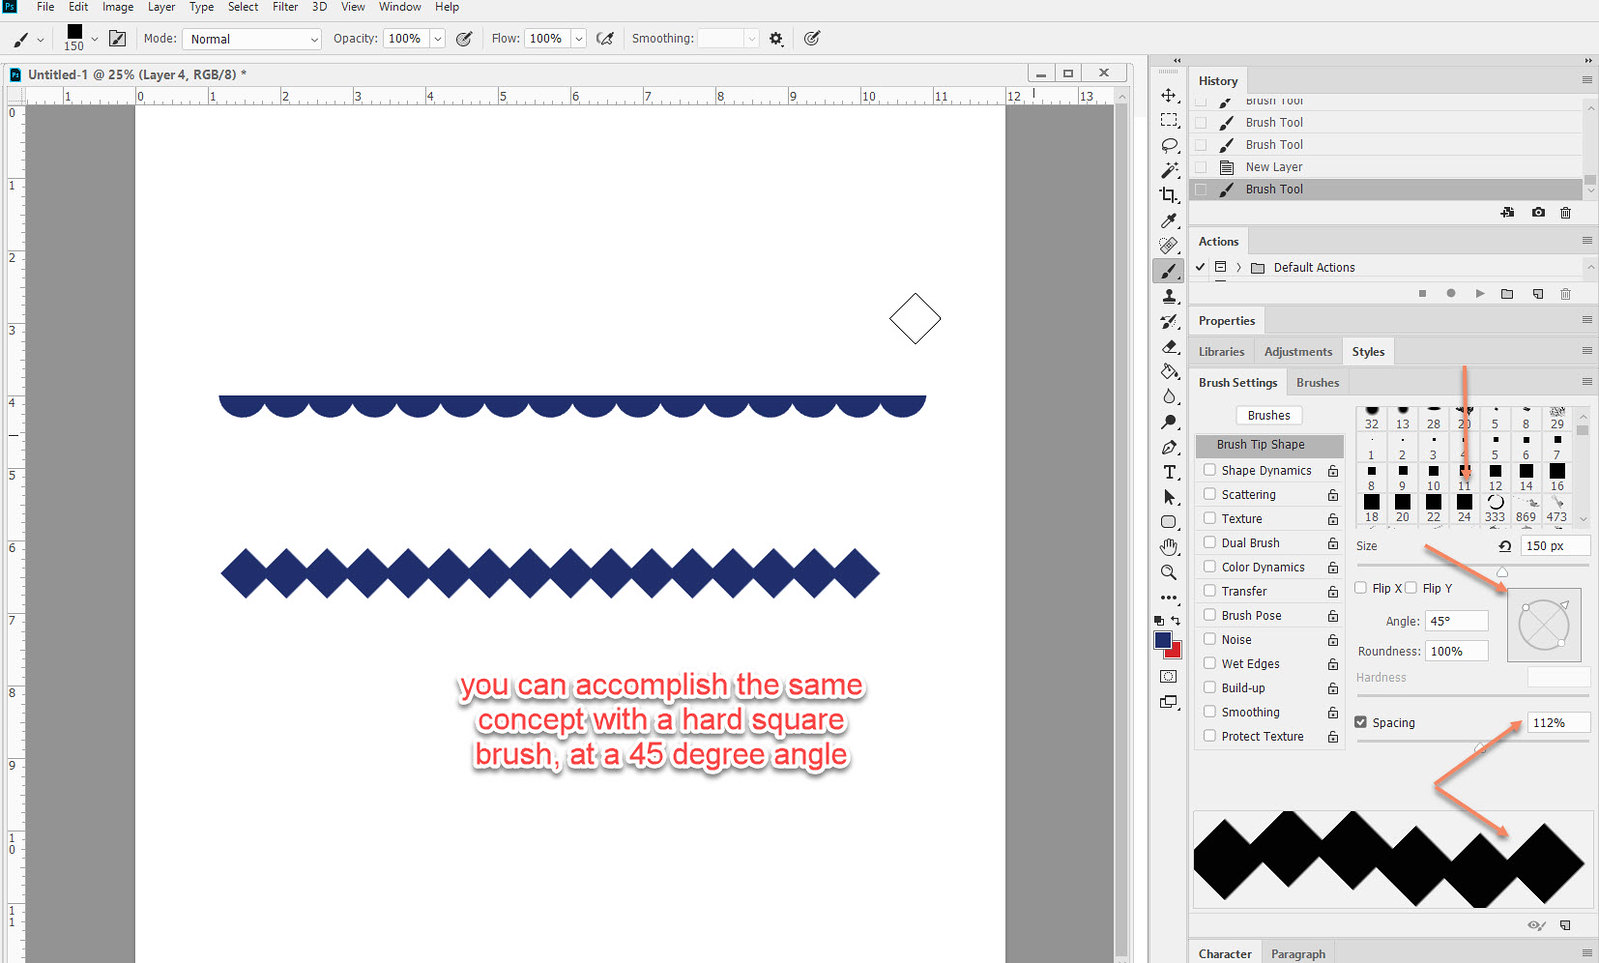
As an interesting variation, you could create a diamond shaped border in a similar fashion. You would use a square brush instead and adjust the angle to 45%. Or to a slightly smaller or larger number for a less perfect diamond shape.
 Diamond edge
 by
Stacia, on Flickr
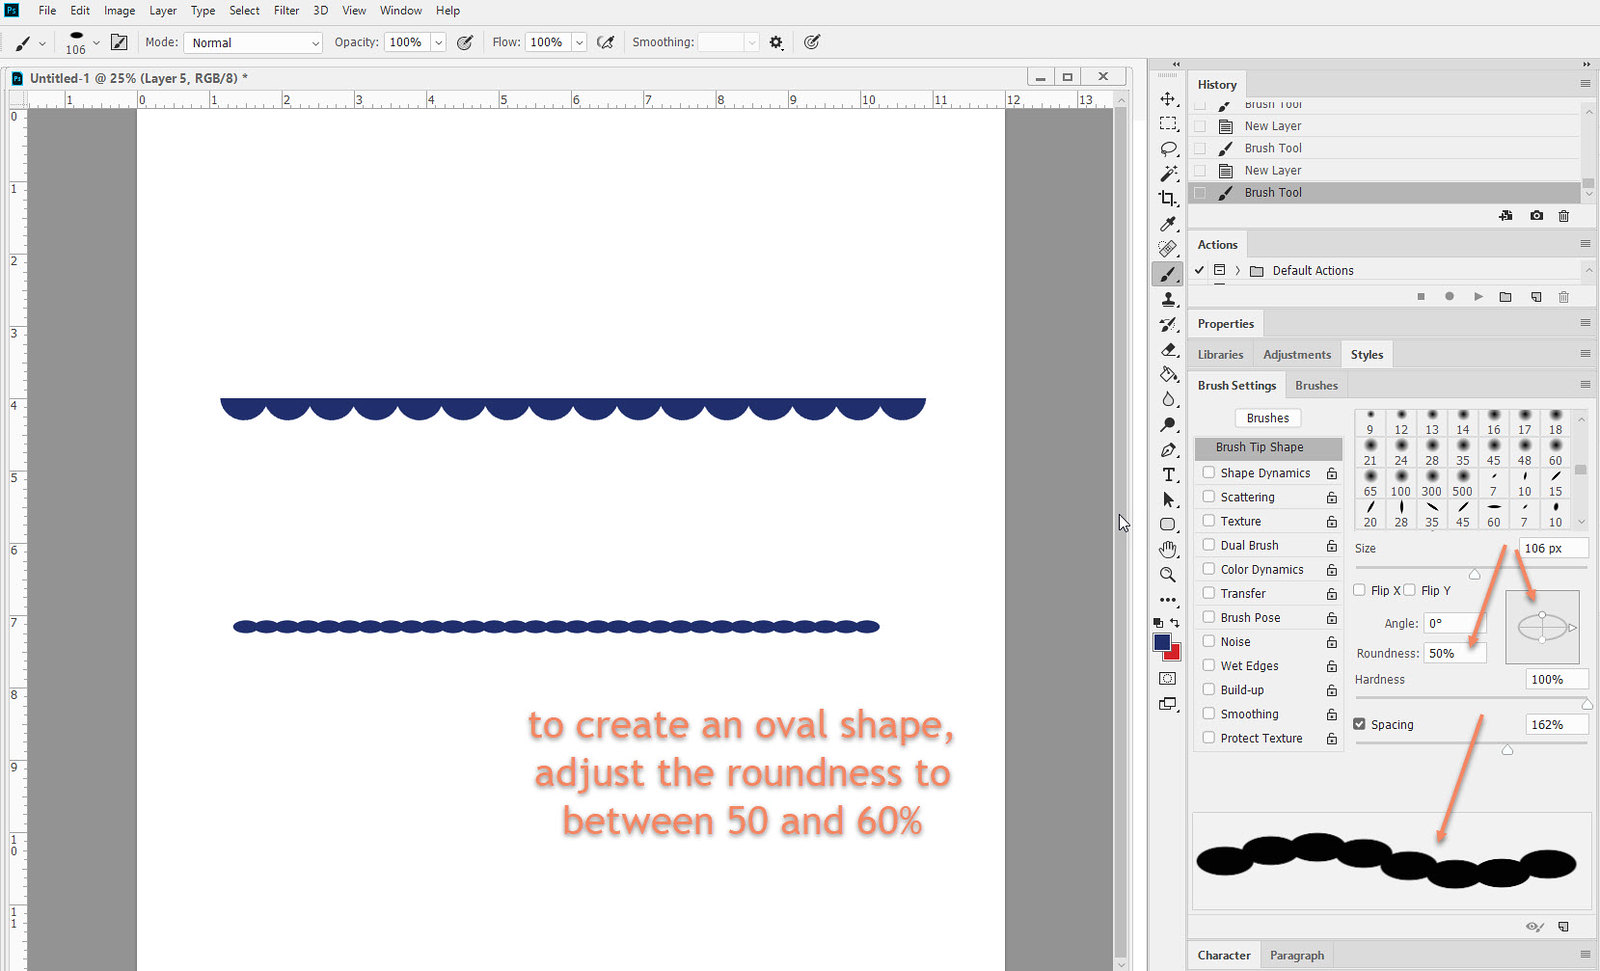
Maybe a perfectly round scallop isn’t your wish. You can adjust the shape to a more oval one by adjusting the roundness slider of a round brush until it suits your purposes. The preview window at the bottom helps you achieve your preferred look. You can adjust the roundness value either by changing the amount in the box or by pushing/squishing the round shape into an oval.
 Oval
Oval by
Stacia, on Flickr
You can take this one step further by adjusting the angle of the oval shape to around 45%. You’ll have to adjust the spacing to make the edges overlap as well. This creates a sort of rope-shaped border. You could even apply a fabric type style or texture to it if you like.
 rope
rope by
Stacia, on Flickr
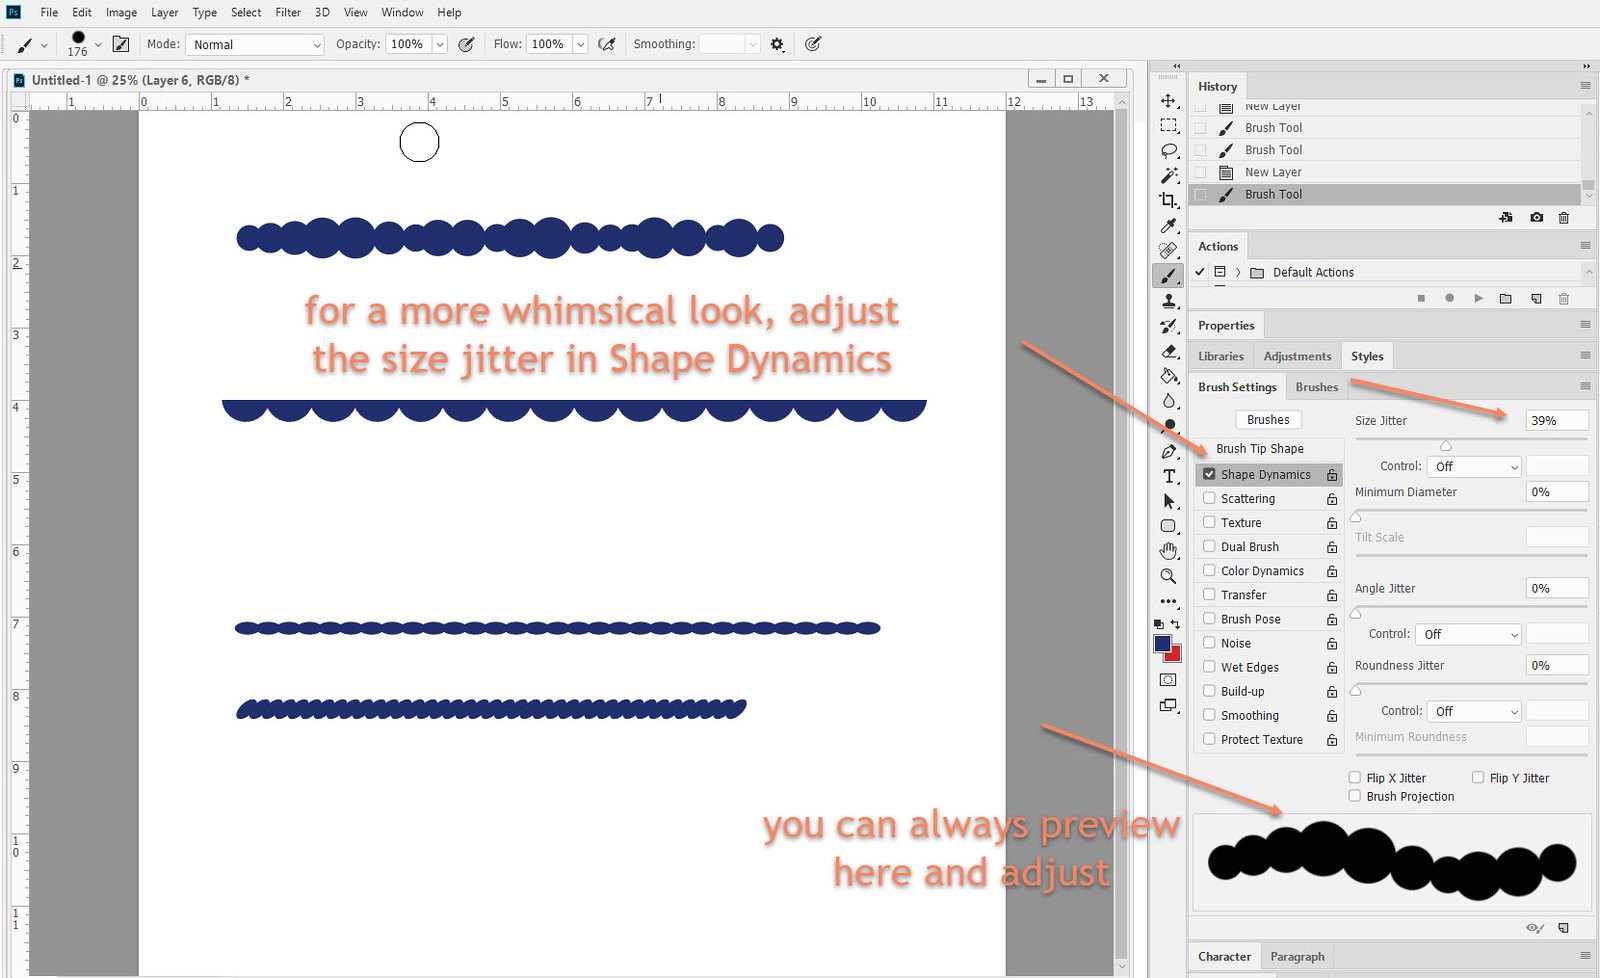
Let’s say, you would like a more whimsical border for your page. You could play with the Size Jitter in the Shape Dynamics section of the brush settings box.
 Whimsical
 by
Stacia, on Flickr
Borders like this can be very versatile. You could outline a photo on your layout to make it POP. You could divide areas of your page with a shaped border. You can add styles to them and achieve a wood look, an acrylic look, a wire look… the possibilities are endless!
What’s your favorite trick for creating a border?


