Can you believe it? Just like that and we are finished with January!!! Esther here with you again with a slightly different tutorial. I know I'm usually bringing paper scrapbook styles to you digitally and this month I decided to go a slightly different route. I want to focus on a particular technique that I use in regular Photoshop and show you how you can re-create a similar effect in PSE. I'm going to show you how you can separate your drop shadow into a separate layer.
***For this tutorial, I will be using PSE 2021.****
Many times I make my drop shadow it's layer when I want to exaggerate the shadow in anyway and sometimes I even like to duplicate the shadow and move it on top of my object and use gradient blending to create different shadowing effects. When it came to using PSE it took me a minute to figure out the best approach that works for me. It's possible that there are other tutorials out there with different methods, I just found this approach to work for me. While this tutorial will not include full completed layout, I am using my background paper and the element from Simply Smitten, Pink Reptile Designs latest release in her new shop over at Sweet Shoppe Designs.
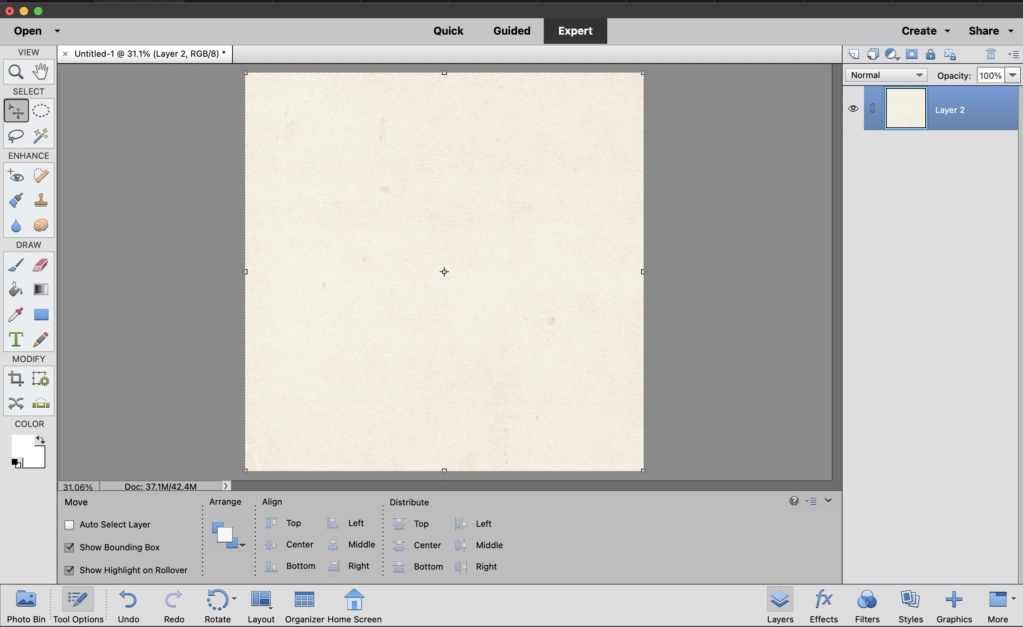
Starting with a 12 x 12 canvas, I added a lighter color background to make it easier to see the shadow(s) as we work with it.
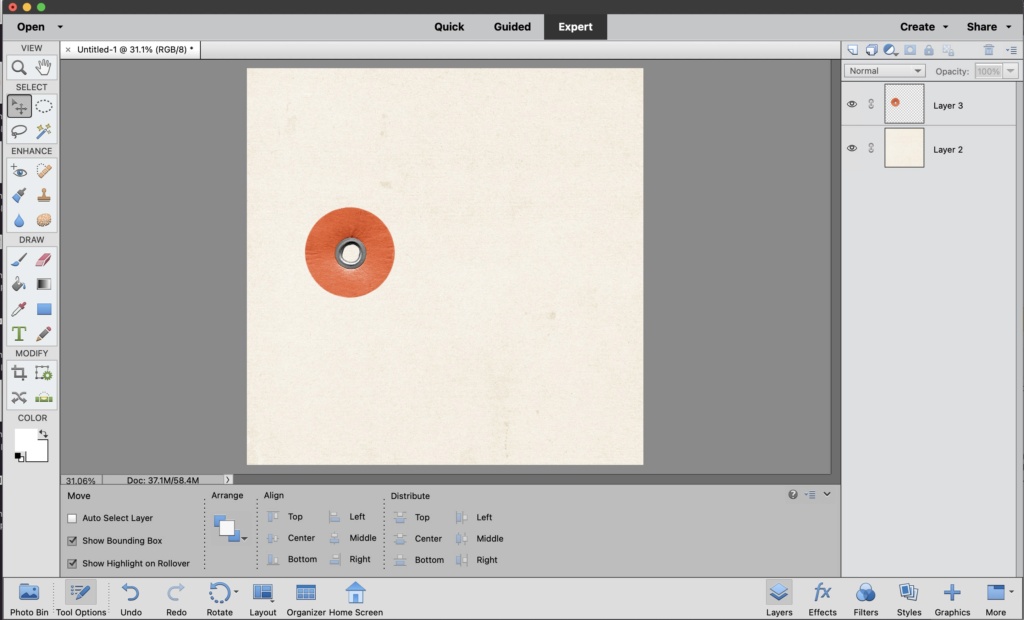
Next, I dropped in this eyelet element and enlarged it to make it easier to see the shadow as we work with it.
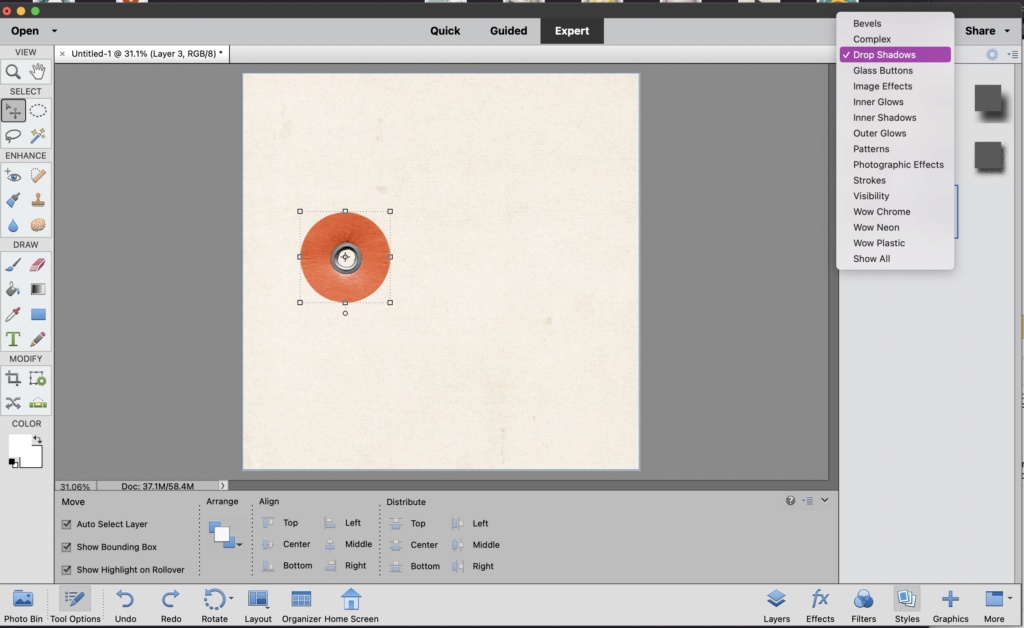
Then I selected the layer with eyelet element and then I went down to the bottom of the screen and selected my "styles" icon.
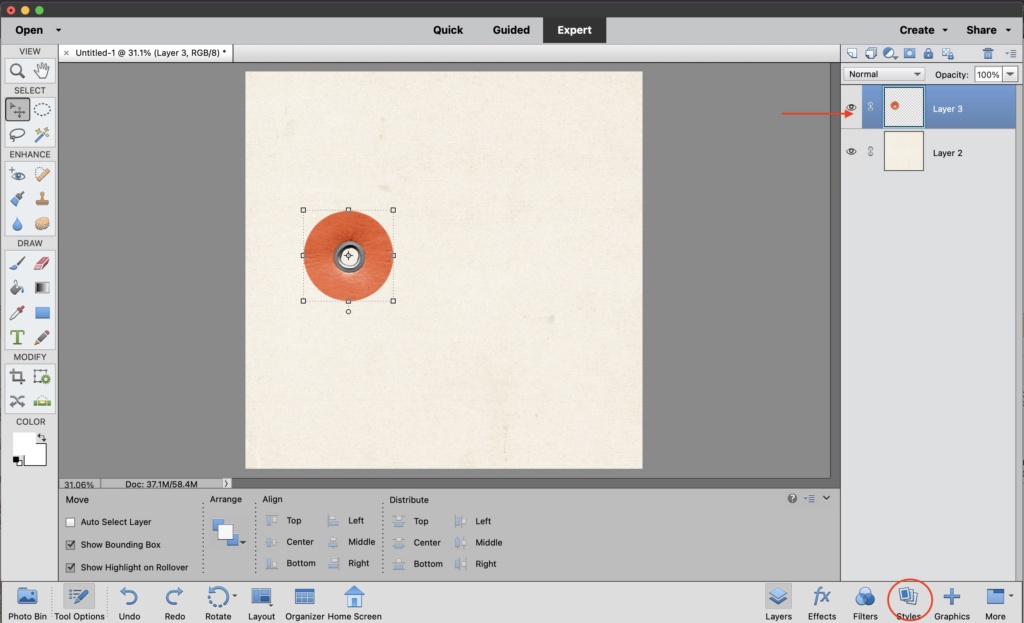
I then selected the option for "drop shadow"
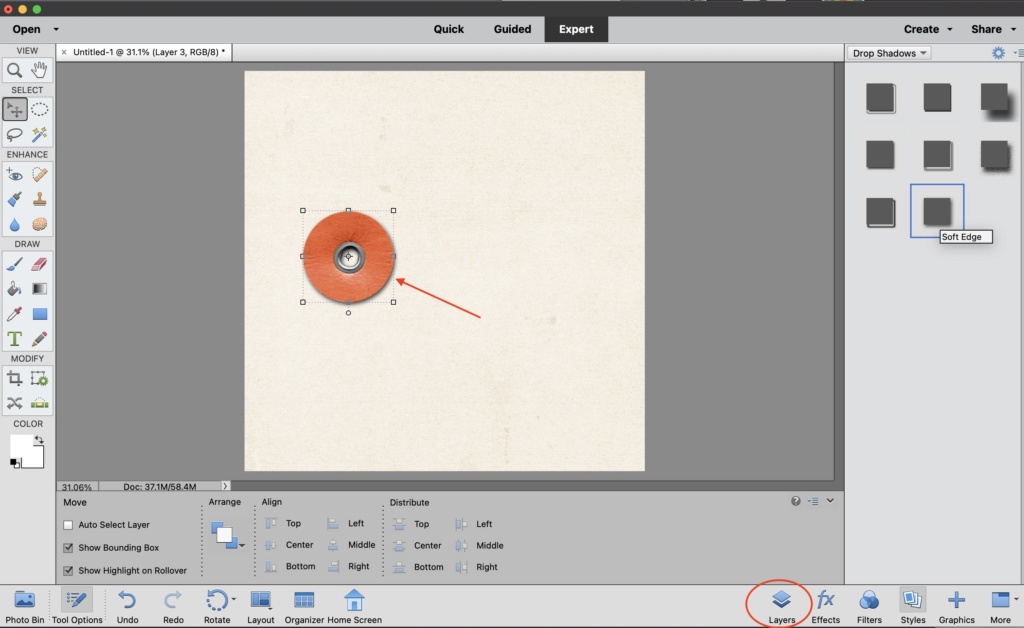
You can play with these different shadow effects and pick the one that meets your personal preference, for this tutorial, I used the "soft edge" drop shadow. Once, I selected the drop shadow I wanted, I then went down and clicked on the "layers" icon.
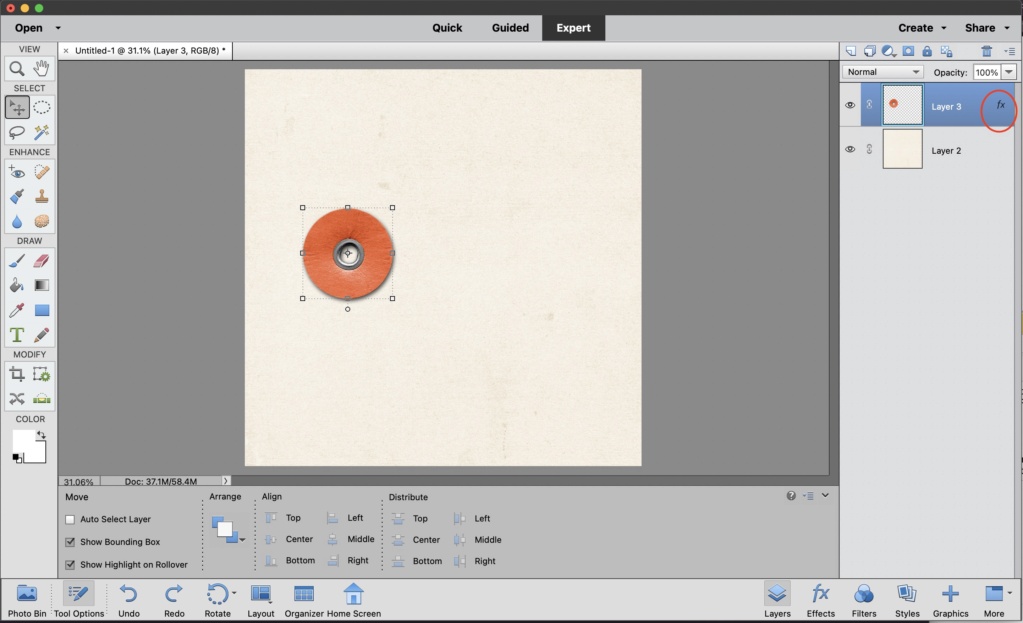
I then clicked on the "fx" symbol on my element layer.
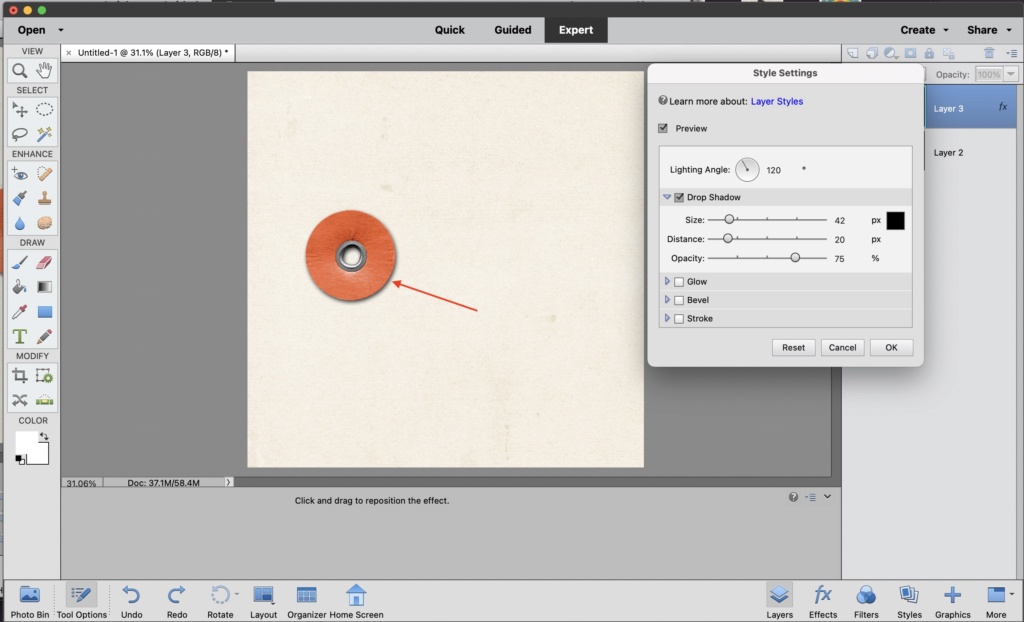
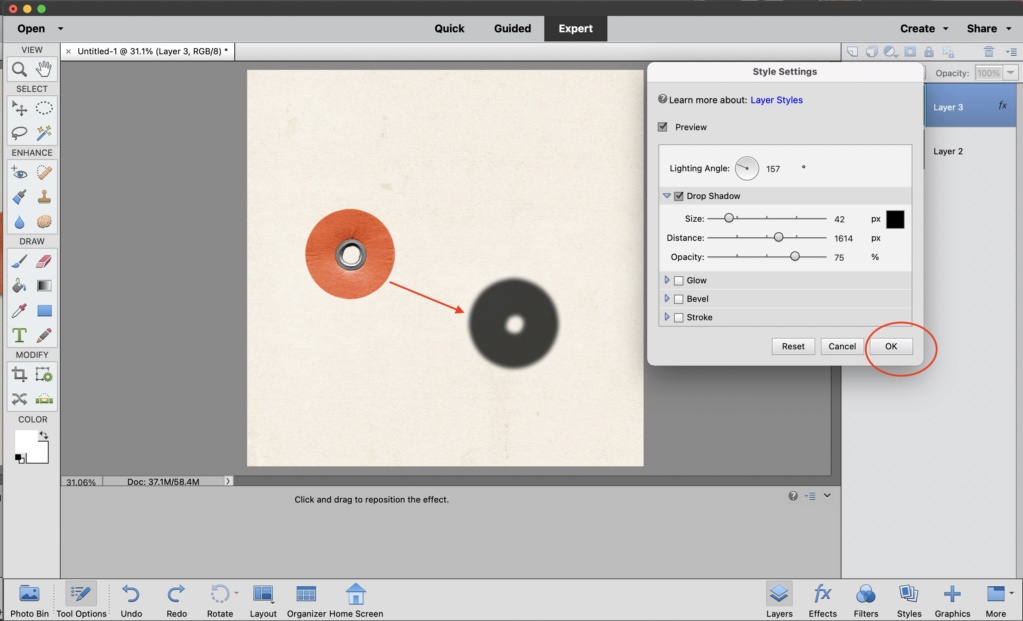
Your screen should looking something like this. Before you separate your shadow from your element, you can make any adjustment to it, that you want-afterwards, go up to the shadow and put your cursor on the shadow.
Now click on the shadow and slowly bring it out to a space on your page where it's completely separated from the element and select "ok."
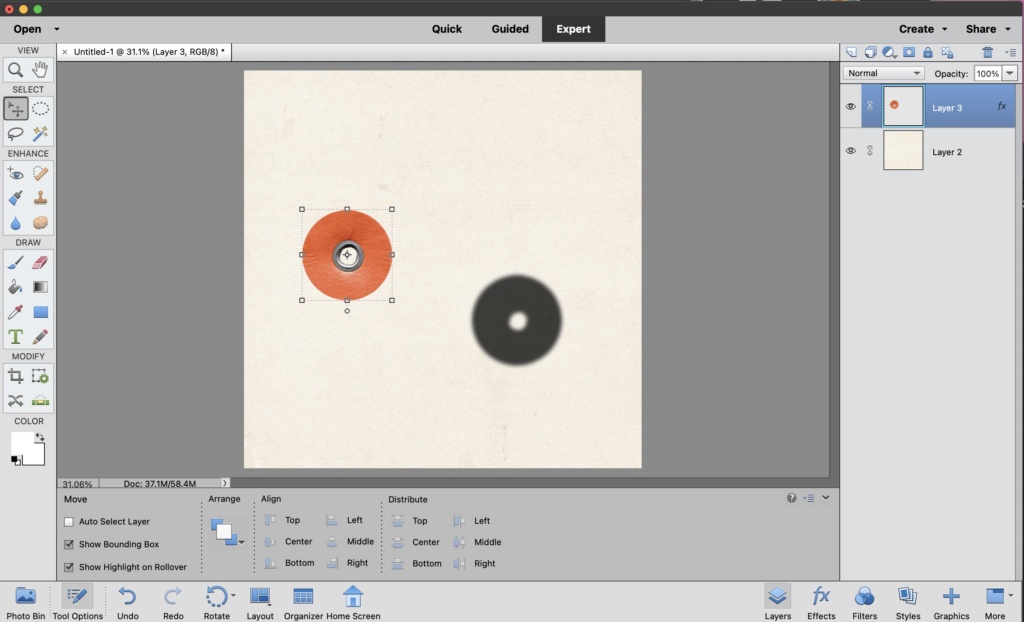
Take a look at this layer on the right hand side of the screen, it shows the element and the shadow, except this layer doesn't really "recognize" the shadow yet. If you look on the right hand side in the layers panel, it only shows the element for my "Layer 3."
So to "trick" the system, we need to simply for this layer. You can do that by right clicking on the specific layer and selecting "simplify layer."
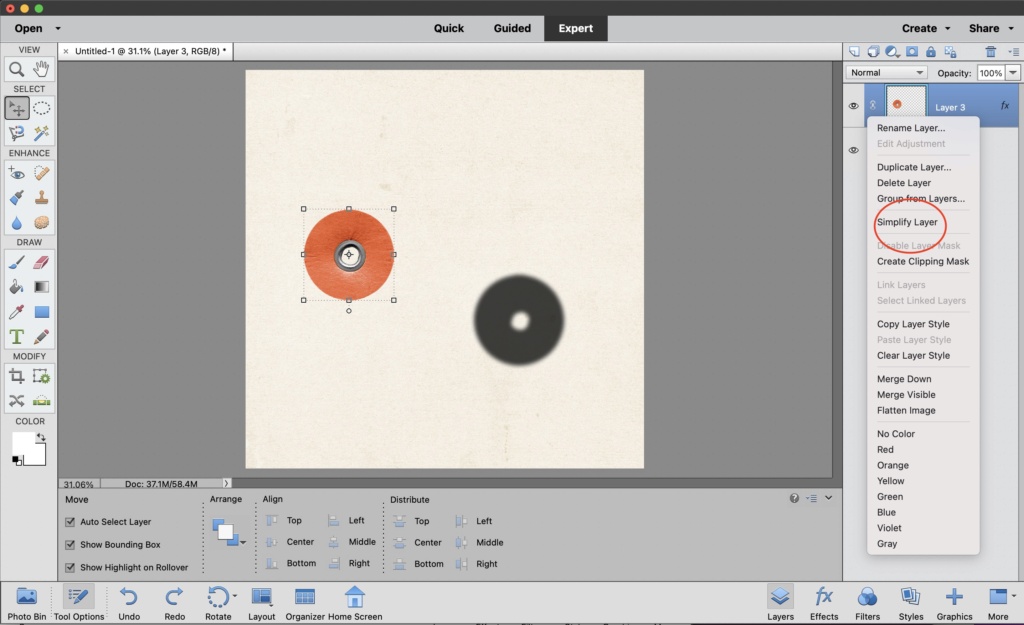
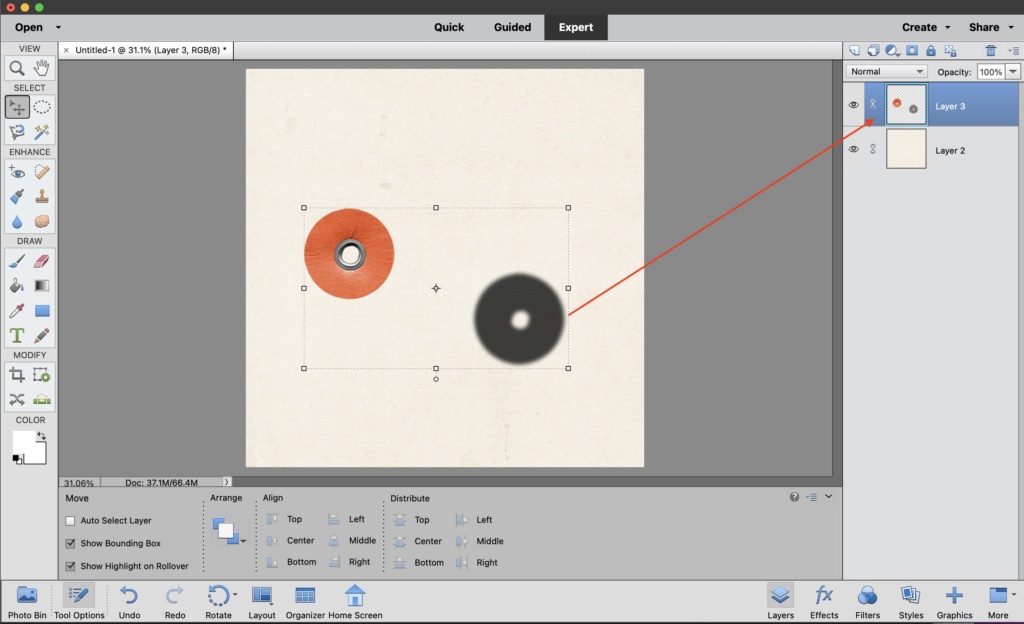
Once the layer is simplified, take a look at "Layer 3," now you can see the element with the shadow layer. That is what we want, in order to do the next step.
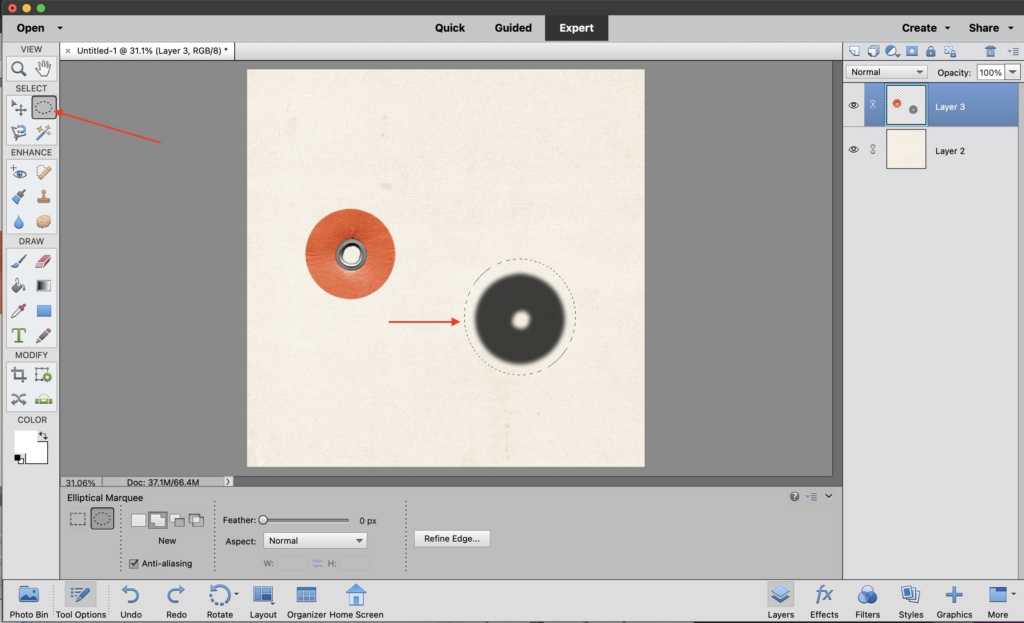
Now we want to make that shadow its own layer. To do this, make sure the layer is selected, then go and use the marquee tool-you can see where the arrow is pointing on the left hand side of my screen, that is what the tool looks like. Take that tool and go and draw/drag a selection around the shadow.
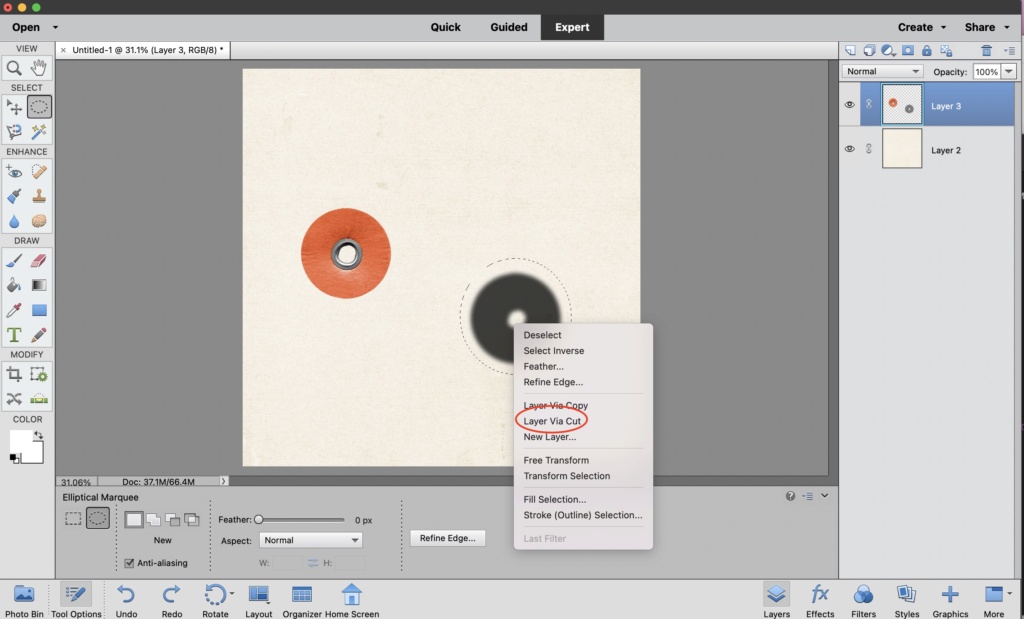
After you have selected the shadow, now right click and select "layer via cut".
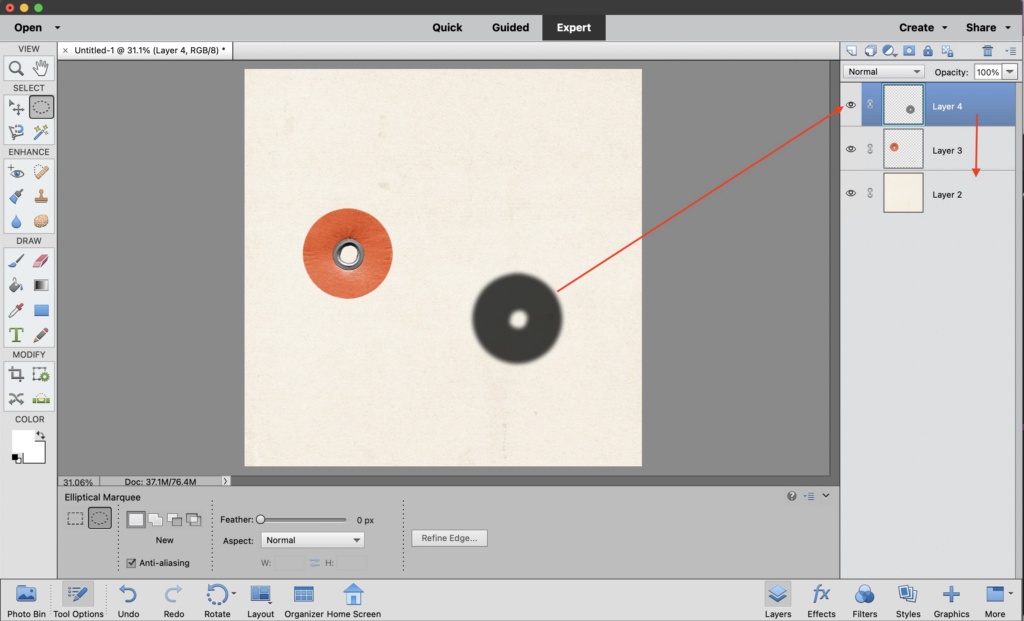
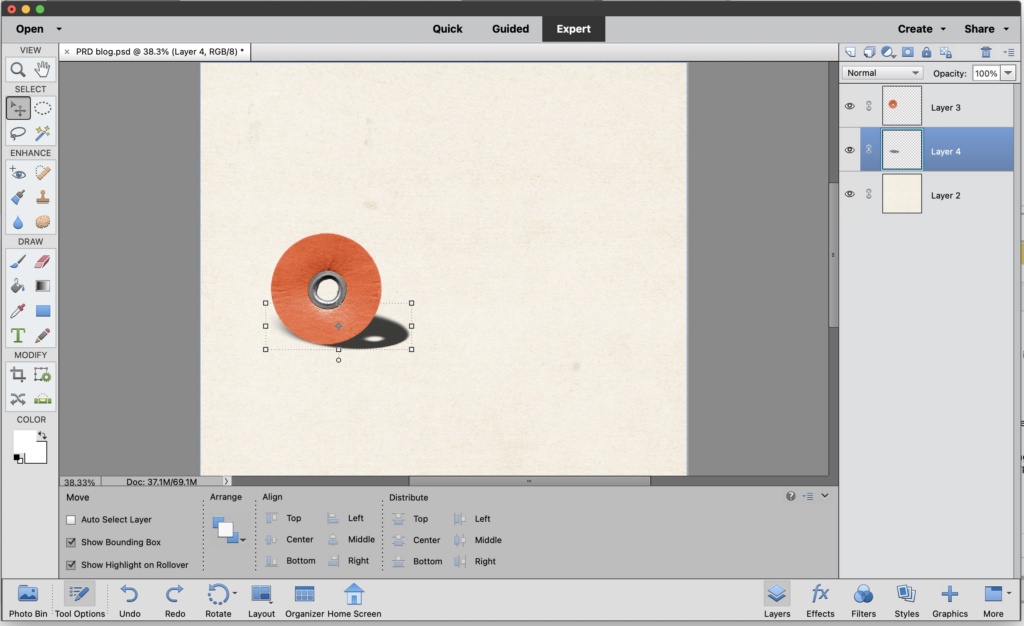
Now take at your layers on the right hand side. The shadow now appears as layer 4. (How cool is that, right?). Go ahead and select that layer and just drag it beneath your element layer.
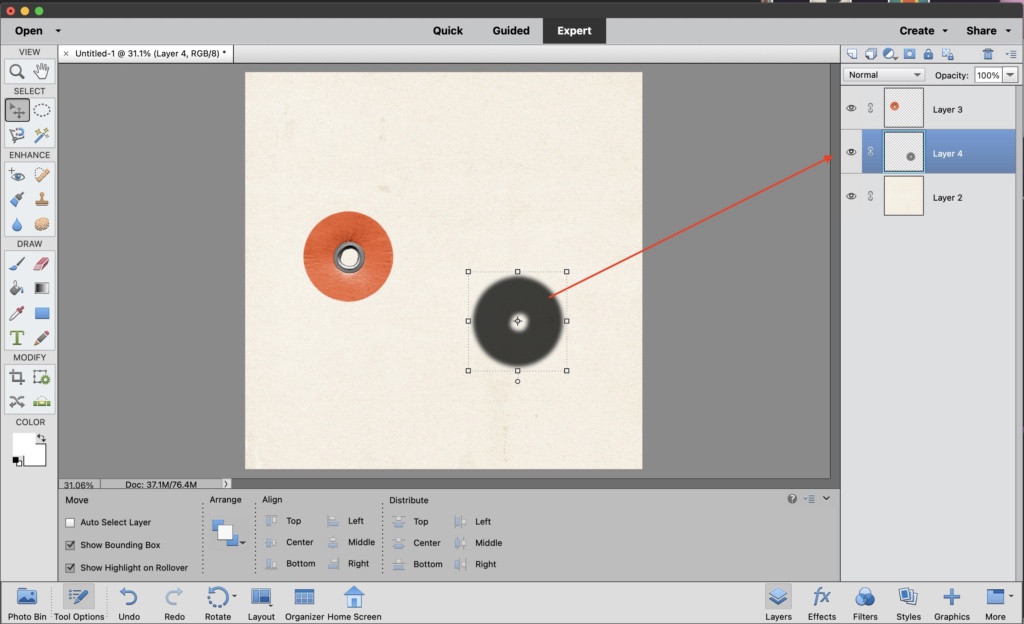
With that shadow layer underneath your element layer, just grab the shadow and move it and place it where you want it in relation to your element.
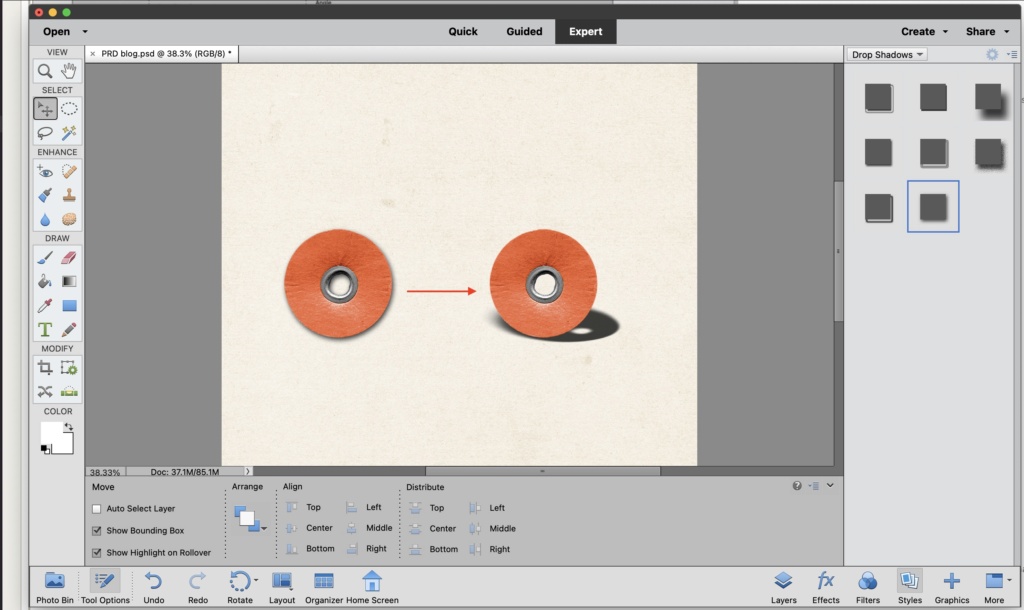
I moved mine right under my element almost like it would appear if I was just doing a drop shadowing and leaving it. This is where it gets fun and you can really do all kinds of fun and wonky things.

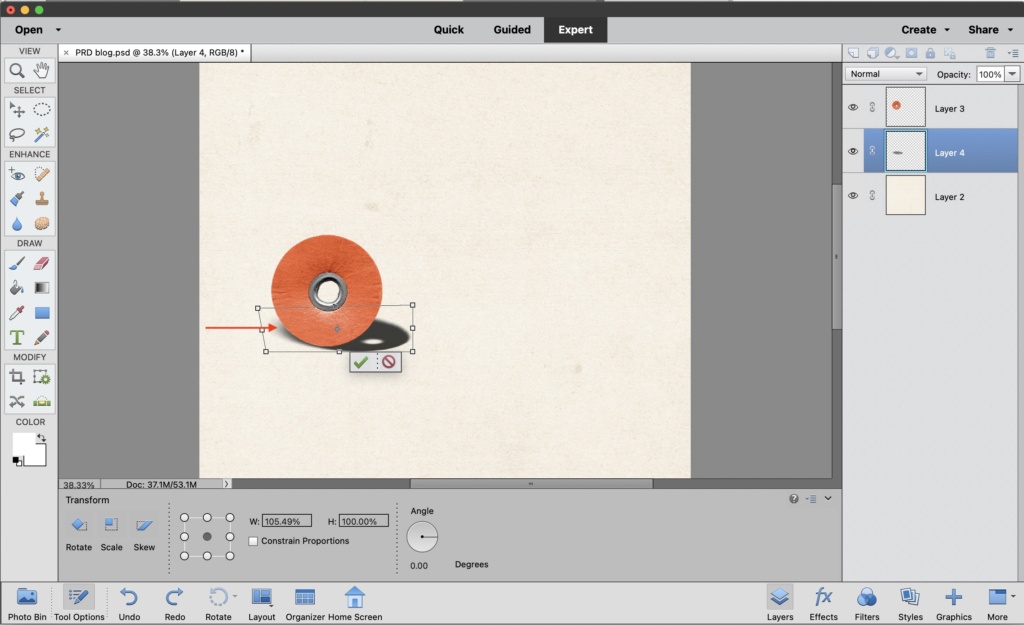
You can exaggerate one side of your shadow to make it look like your element is lifted more on one side.... or you can go extreme like I'm doing and make it look like the element is standing on it's bottom edge vs laying flat. In my opinion, the CNTRL/Command key is your friend during this process (it
ALMOST mimics the warp function from regular PS).. I first select my layer and then I click on CNTRL/Command and grab one of the control squares so that I can manipulate the shadow.

I grab that top right control square, meanwhile I have my CNTRL/Command key pressed and start dragging that right side of the shadow down. Once I like the position of the shadow, I just hit enter or hit the green check mark to accept. This is what my first pass looks like. (looks can vary so don't worry about replicating exactly-it then becomes based on personal preference).
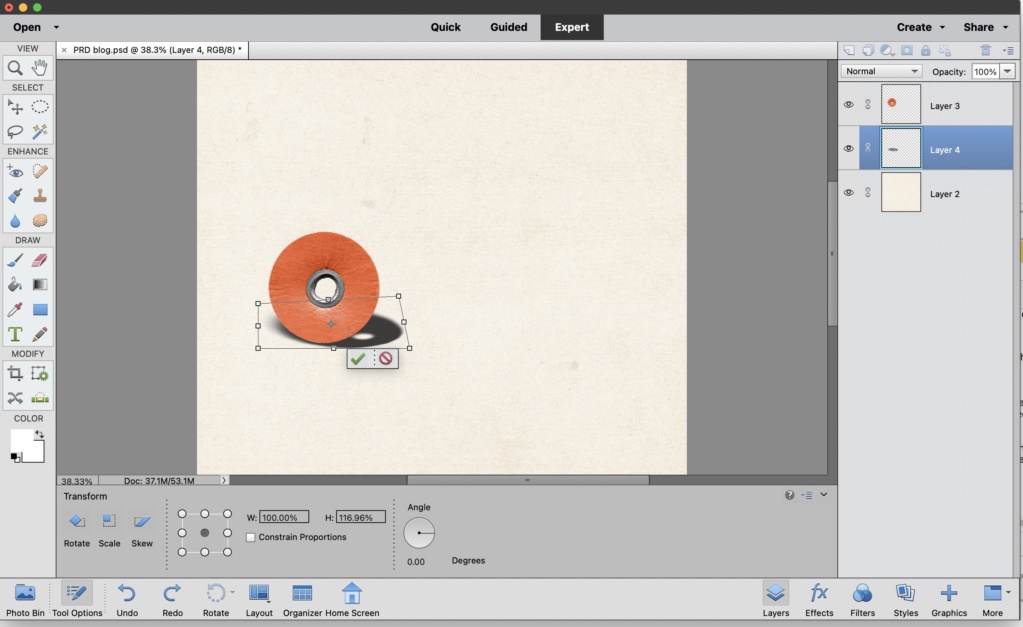
Now, I want my shadow to come to the left of the element just slightly. To tweak this, I make sure I'm on my shadow layer, I press CNTRL/Command and grab one of those square control boxes on the left side of the shadow. I'm grabbing the top left control box of the shadow and just dragging down to the left slightly. (You can tell by the oblong shape of my rectangle that I only drug that top left down slightly).
I accepted the changes. After looking at it, I felt the right side was casting the shadow a little further than I wanted, so I just went back and tweaked it and moved that top right corner of my shadow back to the left. I did this by making sure my shadow layer is selected, clicking "CNTRL/Command" and grabbing that top right "control" square and just dragging that corner towards the left slightly. I then accepted my changes.
Now as you look at this, you can see that by just separating our shadow from our element, one can completely change the perspective of what one sees. How cool is that? I encourage you to have fun, play with this technique and see what fun wonkiness you can add to your layouts. Can't wait to see what you create.